Our Thoughts...
Selected Article
How to correctly miter curved to straight mouldings
Installation of fine decorative mouldings requires a skilled trim carpenter who must possess the knowledge and talent that is required for this difficult work. Installation of curved mouldings requires even greater talent and much more experience. As the complexity and scale of the mouldings increases, so does the difficulty in installation.
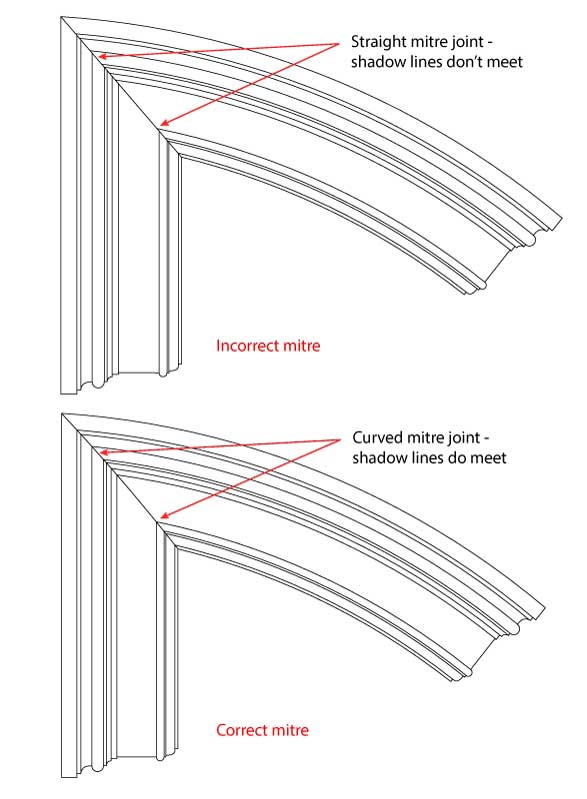
One common mistake made by less skilled trim carpenters is incorrectly mitering the transition from curved to straight mouldings. As seen in the illustrations at right, the incorrect method prevents the shadow lines from properly intersecting, whereas the correct method makes for a perfect joint. The trick is to create a miter joint with a slight curve, not a straight joint. (If you view this illustration at an angle the difference is apparent.) To determine the proper curve in the miter joint, the trim carpenter must make a full scale layout of the intersection. By drawing the miter line through the intersections of the shadow lines, the carpenter can then create a template he can use to transfer the correct miter to the trim pieces.
Although this process involves greater time and expense, the client is rewarded with a beautifully crafted finished product. And, ultimately, the success or failure of the architect’s design hinges on the quality of the execution.
